Spinach & Kale Greek Yogurt Dip Lasagna Roll Ups

Monday, September 21, 2020

YOU GUYS. I don't usually toot my own horn but this is one recipe that I'm pretty darn excited about. I've transformed my favorite Trader Joe's spinach dip into an amazing filling for my lasagna roll ups! The quickest way to a pan of pasta to enjoy this week.

I'm always taking my favorites and thinking about how I can use them differently. This dip is no exception! I devour it right out of the carton but I've always thought it had just a wee bit more potential. And clearly, it does! 

Have you had this dip before? It's the Spinach and Kale Dip from Trader Joe's. THE BEST. This decadent mixture is blended with everything you love about typical spinach dip.   Plus, water chestnuts, red peppers, carrots, green onions and garlic. But don't let that turn you off. You have to try it!  It truly does not taste super "veggie" or healthy.

Healthier way to eat spinach dip, found in refrigerated section at TJs. 

These lasagna roll ups have 6 main ingredients, require very little prep and hit the spot! Mixing my favorite dip in with chicken creates all the flavor and color of other spinach roll ups but without the time chopping, measuring or adding extra seasoning, liquid, etc.  Add in a dollop of ricotta cheese and the creaminess blends perfectly with the firm cooked noodles.  Everything you'd want from a lasagna. And they're nutritious! 

Never eaten lasagna roll ups?  You're missing out. The filling rolls up perfectly into individual lasagna noodles. Lay them in a dish with some sauce, cover with foil and bake. It's such a great way to enjoy pasta. And the part is-- you can make it ahead of time!  

Boil noodles, mix up the filling and roll them up. At this point you can choose to 1) bake now in oven 2) store in refrigerator until mealtime or 3) freeze the pan for a great make ahead meal.

It's so easy!!  Use your favorite chicken and piece, shred, dice-- anything goes! The best shortcut to for meat is canned chicken (drained). And it's delicious! It mixes up so well with NO effort and prep. I'm telling ya, if you don't stock this in your pantry, please try it here. 

I definitely recommend a small amount of ricotta but to be honest, the first couple times I made this, I didn't use any.  But I will say when warmed, the dip had just a bit of a sour taste (probably due to the greek yogurt and small amount of mayonnaise). It wasn't bad, but I think the ricotta cancels out the tang. Plus, it gives a bit more of a traditional lasagna taste that we all love. 

When you remove from the oven, you can sprinkle a tiny bit of mozzarella cheese and fresh spinach on each roll. Replace the foil and let sit for a couple minutes. The heat melts the cheese, wilts the spinach and adds color plus a bit more nutrition. 

Alright. This definitely is one of my favorite meal makeovers. I knew my family loved lasagna roll ups and loved this dip. And I loved getting creative. I hope you love them too!

And great thing--you still have the rest of the spinach and kale dip to devour. Or to make another family friendly recipe with. Stay tuned ;)

xo, 

Brit

Spinach & Kale Greek Yogurt Dip Lasagna Roll Ups

Ingredients:

3 cups chopped cooked chicken
1 cup Spinach & Kale Greek Yogurt Dip from Trader Joe's
1 cup ricotta cheese (part skim)
1/4 cup grated parmesan cheese
2 cups marinara sauce
10 lasagna noodles
Olive oil, mozzarella cheese, fresh spinach pieces, optional

Instructions:

1. Boil lasagna noodles per instructions on package. Drain, lightly drizzle with olive oil to avoid sticking and lay flat on pan
2. In bowl, combine chicken, dip, ricotta and parmesan cheese
3. Spread 1/3 cup mixture on each lasagna noodle and roll jelly-roll fashion
4. Pour and spread 1 cup  marinara sauce into bottom of baking dish
5. Arrange lasagna rolls, seam-side down in sauce in dish
6. Top with remaining marinara sauce
7. Cover with foil and bake at 375 degrees F for 30 minutes or until hot (sauce will bubble)
8. Top with mozzarella cheese, fresh spinach, recover for 1-2 minutes
9. Uncover and serve

Notes:
  • Sub your favorite white sauce for marinara for a completely different look/taste!
Read More

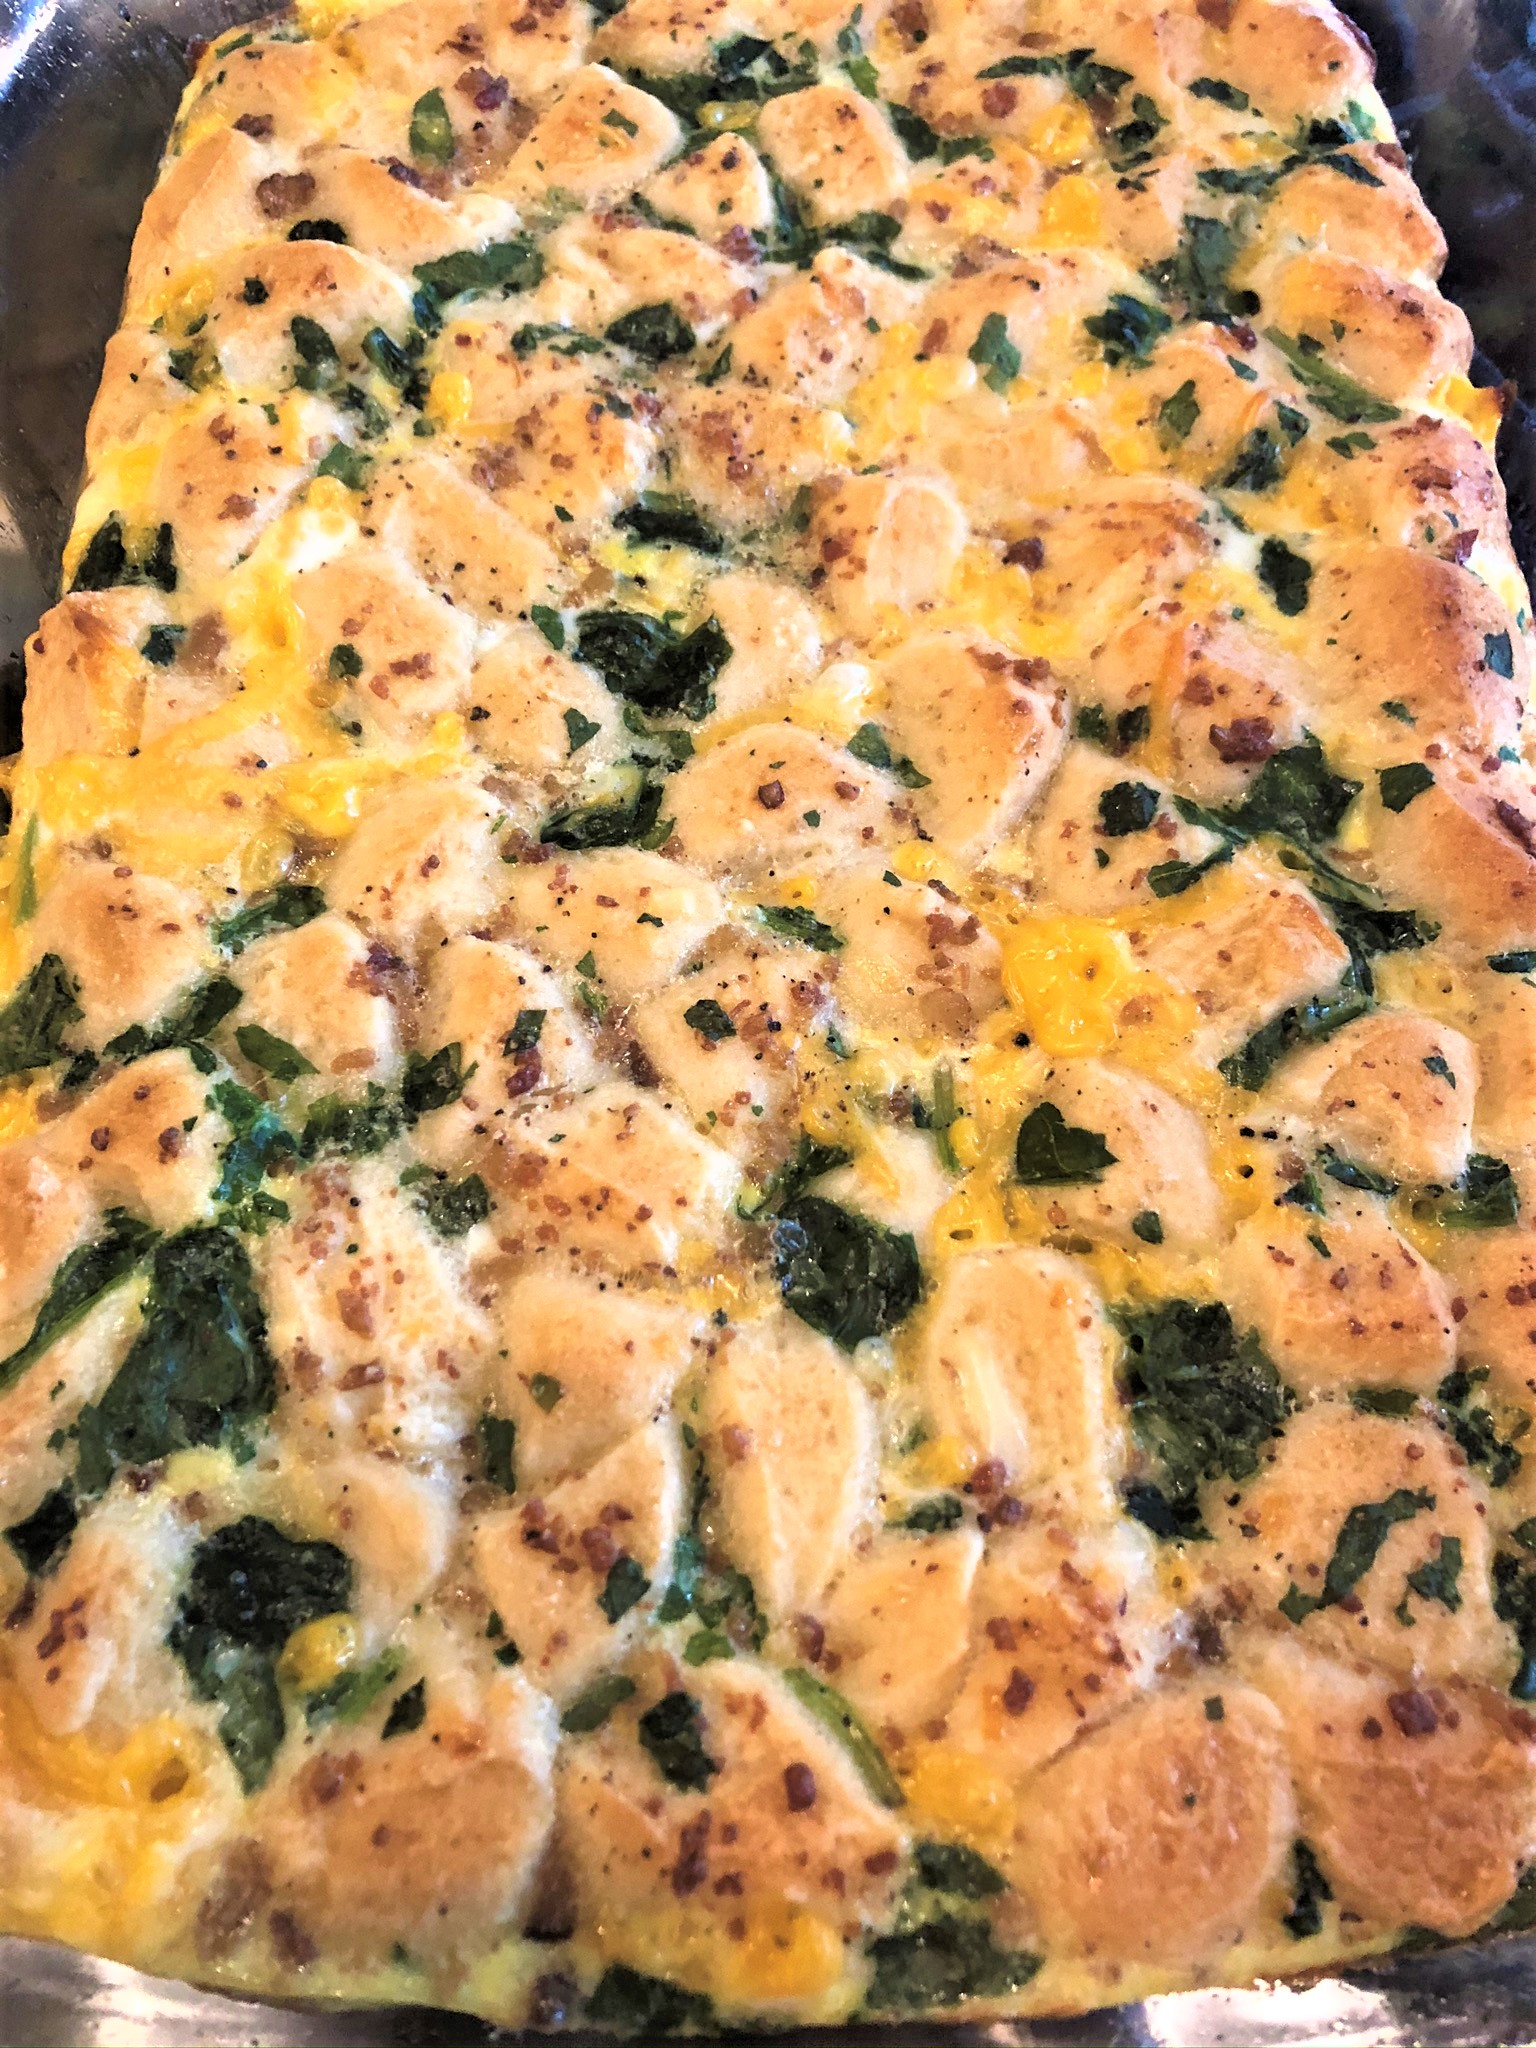
Bacon Spinach Egg Bake

Monday, September 14, 2020


Whisk your eggs. Open a can of biscuits. Mix them together and enjoy a flavorful bake that is healthy, flavorful and pretty too! 

I've been anxious to share this egg bake with you all-- this is a classic!  I've made this for special occasions like Easter brunch but it's also perfect for an easy weekday dinner. As a new mom of two, this was definitely on repeat. One dish, easy to prepare amongst chaos and full of healthful ingredients.   You can use whatever you have on hand. But I recommend always keeping bacon bits in your pantry. 

Bacon bits are shelf stable, easy to store, and taste marvelous in a pinch. Or even when you're not in a pinch. I'm not one to get hand deep in bacon grease anyways but do love the flavor. And protein!  We like quite a bit of bacon in this dish. You could use less and still get the taste.

The combination of bacon bits with garlic powder and spinach is amazing.  And here's the perfect of amount of ooey gooey melted cheese upon golden brown biscuits that puff up to perfection. This gives the taste of one of my favorite quiches from a local restaurant but is so much faster and I know a bit healthier.  

And even if you're not an egg lover, give it a try. My daughter will not take to eggs (in any form) for anything but will eat this by the fist full. Okay, I have to put some ketchup on it but hey, however they'll eat it right?!

So how do I like my eggs?  In a bake!  And I hope you will too. 

Enjoy!

xo,

Brit


Bacon Spinach Egg Bake

Ingredients:

1 can biscuits (10 count)
6 eggs
3/4 cup real bacon bits
1 cup of milk
1 cup spinach pieces
3/4 cup shredded cheddar cheese
1/2 tsp garlic powder
salt and pepper, to taste 

Instructions:

1. Preheat oven to 350 degrees and lightly grease 9x13 baking dish
2. Cut each biscuit into 1/8th pieces, line pieces equally in dish
3. Sprinkle bacon, spinach and cheese on top of biscuit pieces
4. Scramble egg and milk together, stir in garlic powder, salt and pepper 
5. Pour egg mixture on top of biscuits
6. Place dish into oven and bake for approximately 35 minutes, or until biscuits are golden brown


Notes

  • Any milk can be used
  • Ensure biscuits remain equally spaced once placed in oven

Like this recipe but looking for something sweeter?  Try my French Toast Bake
Read More

Healthy Habit: Wash your hair...and your shower

Thursday, September 10, 2020


After having kids, I started the weekly habit of cleaning the shower when I washed my hair. Not only is it a time saver, but honestly....it reduces stress. Which then makes me happy.

I don't have certain days or a system to doing housework but I'm trying to be better about that honestly. The other day my husband and I were talking that we should just hang up a calendar so we all know that a certain day is a certain task.  We might try it, at least for those less frequent chores. But it's hard as a mom because there are chores to do daily such as: 

  • Wipe counters
  • Vacuum crumbs
  • Laundry (one load a day keeps the piles away!)
  • and any random clean of spills, mud, dog puke, etc. 
By the time those tasks are done, who wants to add one more thing?!  I have to trick myself into completing other chores. For example, set alarms for speed cleans. Or fill a basket with all the random items and then deliver the "goods" to the proper place.

But the best trick I've found is pairing a chore with another task. So on the day I wash my hair, I know I also clean the shower.  

Making healthy habits like this are game changers to reducing stress in life. I'd find myself grumpy when I'd walk into the bathroom only to see the soap scrum staring at me. That would snowball into the "who's turn is it?" and "I just can't do it all" thoughts.  Not healthy.

So I've found the easiest way to clean the shower and reduce stress. And I can say that I just feel more accomplished when the shower is glistening clean. 


What are Mr. Clean Magic Erasers?

Mr. Clean Magic Erasers are durable cleaning pads that scrub off (or erase) tough soap scum, grime, and residue.  They are said to erase 3x more soap scum than an all purpose spray cleaner.

They work beautifully on our shower fixture which is primarily glass. And the scent is yummy-- it leaves the bathroom smelling clean but not like harsh chemicals.

How do you use Magic Erasers?

Just add water to the cleaning pad and squeeze to activate the built in cleaner. 

There's no need to rinse the surface after, although I do on the bottom of the shower where we stand. I also wear a glove when using the eraser just to avoid contact with the cleaner. These are both just personal preferences. 

Why is it important to clean your shower?

  • A clean shower improves your health. Imagine mold buildup which can be harmful to breathe in, especially for those with breathing problems. And bacteria, viruses and pathogens can live on surfaces so it's essential to wipe down bathroom surfaces at least once a week to avoid illness.
  • You've tackled a task! Completing a task can then carry positive energy on to other tasks around the house throughout the day
  • Less mess is less stress.  I've found this to be true especially after having kids.
  • It just looks better which makes you feel better 

I love the Mr. Clean Magic Erasers made specifically for the bath in the shower but use all magic erasers for various tasks around the house. Look for them in the cleaning aisle at Target/Walmart, grocery stores and even Hardware stores. 

Check out their website to learn more about the products as well as tips and how to's.

I'd love to know-- how do you clean your shower? Have I convinced you that it is just as easy as washing your hair? ;) 

Read More

Taco Pizza

Monday, September 7, 2020


What's for dinner? Tacos or pizza?  Why not have both?!  

These mini flatbreads are the best of both worlds. So when you simply cannot decide between your two favorites, don't. Enjoy a delicious family favorite in minutes. 

Cook up a pound of taco meat at the beginning of the week so all you have to do is mash, sprinkle and bake.  Once the oven is warmed, this meal is done in under 10 minutes.

Did I say mash?  Yes!  Mash the refried beans to thin out a bit and stir in salsa to use in place of traditional pizza sauce. Such a great way to sneak in all the nutrition of refried beans-- fiber and protein.  You could even mash black beans or any favorite bean instead.  

The bean mixture spreads perfectly onto these flatbreads.  These mini naans from Aldi are my absolute favorite! They come eight to a package and  make the perfect puffy, yet crisp "crusts" for individual pizzas. Using naans are great for perfect portions and gives a more homemade taste without the mess.  And they're so filling!  For this recipe I usually make about half one night and another batch the next for leftovers. If you make all eight on two baking sheets, cooking time may vary slightly. 

Remember you can easily use your own favorite crust, including whole wheat or gluten free.

Looking for additional nutrition? Add extra toppings like plain Greek yogurt in place of sour cream, cut up fresh avocado or additional veggies. You could even omit the meat for a veggie option too!  

Our Friday takeout nights are quickly being replaced with this tasty tradition.  I love having all the ingredients ready and set out and allowing us to take time as a family to prepare, bake and enjoy together.  I continue to find that even the easiest meals offer the best memories.

Enjoy!

Xo,

Brit


Taco Pizza

Ingredients

1 package (8 pieces) of plain mini naan (I love Specially Selected naan from ALDI) 
1 pound taco meat, prepared
1/2 cup salsa
1 can refried beans
2 cup shredded cheese
fresh spinach leaves, casually chopped
diced tomatoes 

Instructions:

1. Preheat oven to 400 degrees. Lightly spray baking sheet with olive oil.
2. Mix refried beans and salsa in bowl until combined
3. Spread bean mixture on top of each flatbread and top with ~ 1/2 cup taco meat
4. Sprinkle on spinach, tomatoes and 1/4 cup shredded cheese
5. Bake for approximately 10 minutes


Notes
  • Naan can be baked from frozen ( I often keep mine in the freezer), recommend sprinkling lightly with water before toppings
  • 4-5 flatbreads per baking sheet
  • Keep fresh spinach leaves in freezer for easy crumbling 
  • Can adjust amount of beans to salsa ratio per preference
Read More

Healthy Habits: Life less toxic

Wednesday, September 2, 2020


Hi! So I want to start a new series of posts on here highlighting simple ways I stay well through 'Healthy Habits." I'd thought I'd kickoff with talking about cleaner living/less Toxins. 

I've gotten quite a few questions lately asking about where I'm at in my journey to Toxic free living.  If you follow me on Instagram, you may have seen me cleaning with vinegar, sharing my favorite cleaning cloth or diffusing essential oils.

But you've also probably seen me bake with boxed muffin mixes and give my kids some prepackaged snacks. Many which may have some artificial junk in them...aka "chemicals."

Well, that's what I call balance. And that's exactly where I'm at on this journey. And truthfully, I may always be right here. But I'll explain why I'm trying to live less toxic and how I started.

Why less Toxins and chemicals

Well that's easy.  I want to eliminate harmful toxins and chemicals that can impact our bodies and environment. Did you know chemicals can mess with hormones and affect how our bodies AND minds work? Not to mention constant exposure can lead to illness, cancer, etc. 

The longer version of the story is I became aware of terrible chemicals and toxins during my infertility journey. But then really started contemplating it more once my son was about 18 months.  He had chronic congestion and runny nose and after much discussion to rule our allergies, etc. I started doing my own research and stumbled upon so much information talking about household products and chemicals. 

I was shocked learning about the products I thought were doing good (candles!) were actually introducing harmful toxins into our environment!

But there was something about the birth of my daughter that made me go into action.  Perhaps it was because she was soon into licking floors. Or perhaps it was because breastfeeding was still just as hard as it was with my son and I wanted to ensure I gave her the very best nutrition when weaning. 

I'll also say that when it came to household chores, I needed to be able to do these around my kids (gone were the days of free time!) But I couldn't be spraying Lysol and Windex with them underfoot.  So it began. Mission: reduce toxins for an easier, healthier lifestyle.  

How to reduce Toxins at home

This is different for everybody. It truly depends on your priorities or goals.  But if you're interested the best advice I have is to just START.  

And notice that I use the word "reduce." Honestly, this is much more realistic for my family and I at this time than eliminating.  

For me, I look at items that I use often. For example, I always lit a candle in the morning and I am always cleaning the floors.  Interestingly, those frequent use items also impact all of us in the house. So that was my overall goal-- healthier living for my whole family. And yes, I'm even thinking about the dog. 

Now items like shampoo and conditioner?  Haven't switched to a natural product.  But this is something I use sparingly.  Gross or not, I only wash my hair 1-2 times per week. So to me, that was not a priority at this time. At least not compared to the multiple candles which I lit (and was inhaling!) everyday. But you can use shampoo as an example of an item in your own life. Even if you didn't want to switch to a cleaner brand, could you use less of it? Or less often?  Again, this goes back to  "reducing" versus eliminating. 


Whole foods

As far as natural ingredients in foods, I think that's so important. But I am perfectly fine eating boxed cake mix in moderation. I truly believe convenience can be healthy. It's all about how often and how you eat them. And treats are called treats for a reason in my book. And you know me, I'll try to find a healthier, faster way to serve it.  

I will say I have done simple "cleaner" swaps with foods such as milk, ketchup, yogurts, etc.  These again are frequent use items and realistic for our family at this time. Being aware and working to reduce sugar, make better choices has always been my biggest priority. 

Above all, I have a passion for shortcuts, fewer ingredients and serving things my family enjoys ensuring all foods fit (and I like to blog about it too ha!) So if it has a few artificial chemicals or a little bit more sugar, so be it.  

Find a Balance

Like working out, a healthy plate and our mental well-being, it doesn't have to be an all or nothing approach. Every little step impacts the bigger picture.  Pick and choose where you feel your best. 

One last thing-- while on this journey, I'm actually finding things (ie. cleaning cloths) that are not only healthier options but easier ones too! So that's been an exciting outcome. For anyone who likes to keep it brief AND balancedI can't wait to share more!

Did you like this Healthy Habit post? I have a lot I want to write about whether it be the fast, fun way I clean my bathroom or my favorite morning routine.   Does this interest you?  I'd love to know your thoughts. And what is your stance on cleaner living? Is it even something you've thought about?

Talk soon, 

Brit

Read More

2 ingredient dinner: Chicken sausage Roll ups

Monday, August 31, 2020


Okay, so I titled these chicken sausage rollups but let's be honest.  These are pigs in a blanket. Or pigs in a bag if you're my four year old.  I'm taking the most simplistic childhood lunch and turning it into a mature version that's suitable for dinner.  Yet still suitable to eat with your hands!

This TWO ingredient meal is an irresistible combination of flaky golden brown biscuit around a sizzling, juicy chicken sausage. With little prep you can feed a crowd in less than 20 minutes!

And use this meal as a reminder--heathier choices are not complicated.  The easiest swaps can offer a more nutritious and flavorful meal.

Chicken sausages are a frequent in my fridge. Whether they are cooked by microwave, grill, pan fry or chop into casseroles, they always hit the spot. And don't forget, they are already cooked.  So all you have to do is warm them and you've got a quick protein.  Each link typically has about 14 grams of protein.  A single hot dog usually only has about 5 grams.

Mix and match varieties of chicken sausage

And while we're comparing the two, the chicken sausage is less fat and less saturated fat than a hot dog. Plus, they're a often larger quantity of meat which is more filling. I have used smaller sausages (great for kids or breakfast) as pictured above. Just know that the size and amount of protein is less than the traditional chicken sausage. 

You can find chicken sausage at any store under so many brands.  I buy them at Trader Joes, Aldi or next to the hot dogs at the grocery store under brands like Johnsonville, al fresco, aidells, etc. My favorite flavors to roll up are the Chipotle Monterey Jack (Johnsonville) or a basic sweet apple flavored (available in most brands). But get creative. Imagine an Italian variety rolled up and dipped into a little marinara!  Yum!

So it's that simple. Serve with a side salad and you've got a brief and balanced meal.

Enjoy!

Brit


Chicken Sausage Roll Ups

Ingredients:

8 count roll of crescent rolls

2- 4 pack of chicken sausage 

Olive oil spray 

Favorite seasoning, optional 


Instructions:

1. Preheat oven to 350 degrees. Line pan with foil and lightly spray to prevent sticking.  

2. Open crescent rolls and unroll them onto baking pan

3. Roll each sausage up in the crescent starting at the wide end. Repeat.

4. Lightly spray top of roll up with olive oil and sprinkle with favorite seasoning. Bake for approximately 15 minutes

Notes

  • These reheat well-- zap in microwave for 15-30 seconds or reheat in oven 


Read More

Nothing Bundt Pancakes

Wednesday, August 26, 2020


Hello!  It seems like forever since I sat down to type at my computer. I took a break last week from devices and it was so needed. As with all aspects of our life, it's important to take breaks. Change the pace.  I feel like these times offer moments of clarity and narrow down priorities. But even more, breaks allow space to daydream, reset and come back refreshed. So here I am, grateful for the time away but also grateful to come back to this "me" time. It feels great to sit down and invest in something I enjoy doing. 

And I've got a great recipe today!!  Breakfast Bundt Pancakes!   These mini cakes are mixed up with your favorite pancake mix and topped with your favorite toppings. Quick, healthful, and beyond delicious. Perfect portions for grab and go breakfast, little hands or... 

Perfect for anyone whose kid won't eat anything but pancakes for breakfast. 

Sound familiar to anyone else? My son has been a pancake fanatic since around 2 years of age. "Pay pays" he says when I give him the choice between cereal, oatmeal, or toast. So I've always been on the hunt for a healthier way to enjoy pancakes.  And yet he knows when I add oatmeal, color them green with spinach, or swap in bananas. Smart kid, right?

Last spring I was decluttering my kitchen cabinets and came across a mini bundt cupcake pan.  I've had it forever with hardly any use. I started brainstorming about how I could use it. The potential for this pan seemed much greater than just a pretty way to serve cake. 

Well, the pan made it's debut on Easter when my son and I made mini lemon cake "nests" with colorful jelly beans "eggs." 

Mini bundt cake as nest with candy eggs, Easter 2020


And that's when it hit me. Mini bundt cakes are meant to hold things...like a nest!  So thinking back to my morning pancake problem, I knew I could knock out two birds with one stone: make a more healthful pancake and create morning variety. 

The whole family now gobbles up these breakfast bundt cakes. I mix up at batch at the beginning of the week using our favorite pancake mix (my son hasn't caught on to the extra protein). The center makes an ideal resting spot for sausage, egg, fruit or yogurt. 


Talk about easy mornings. I reach in the fridge, reheat for about 15 seconds and customize upon serving. These cakes have even replaced those store bought frozen pancakes. I feel confident we've added way more nutrition and variety to each day. And yes, I still offer syrup as a topping on occasion.

You can use any pancake mix.  Typically we buy this protein variety from Aldi. Another great option is Krusteaz protein pancake mix.  If you're looking for extra whole grains and don't mind spending a bit more, I highly recommend Kodiak Cakes. Such fun flavors too!

Protein pancake mix available at Aldi USA grocery

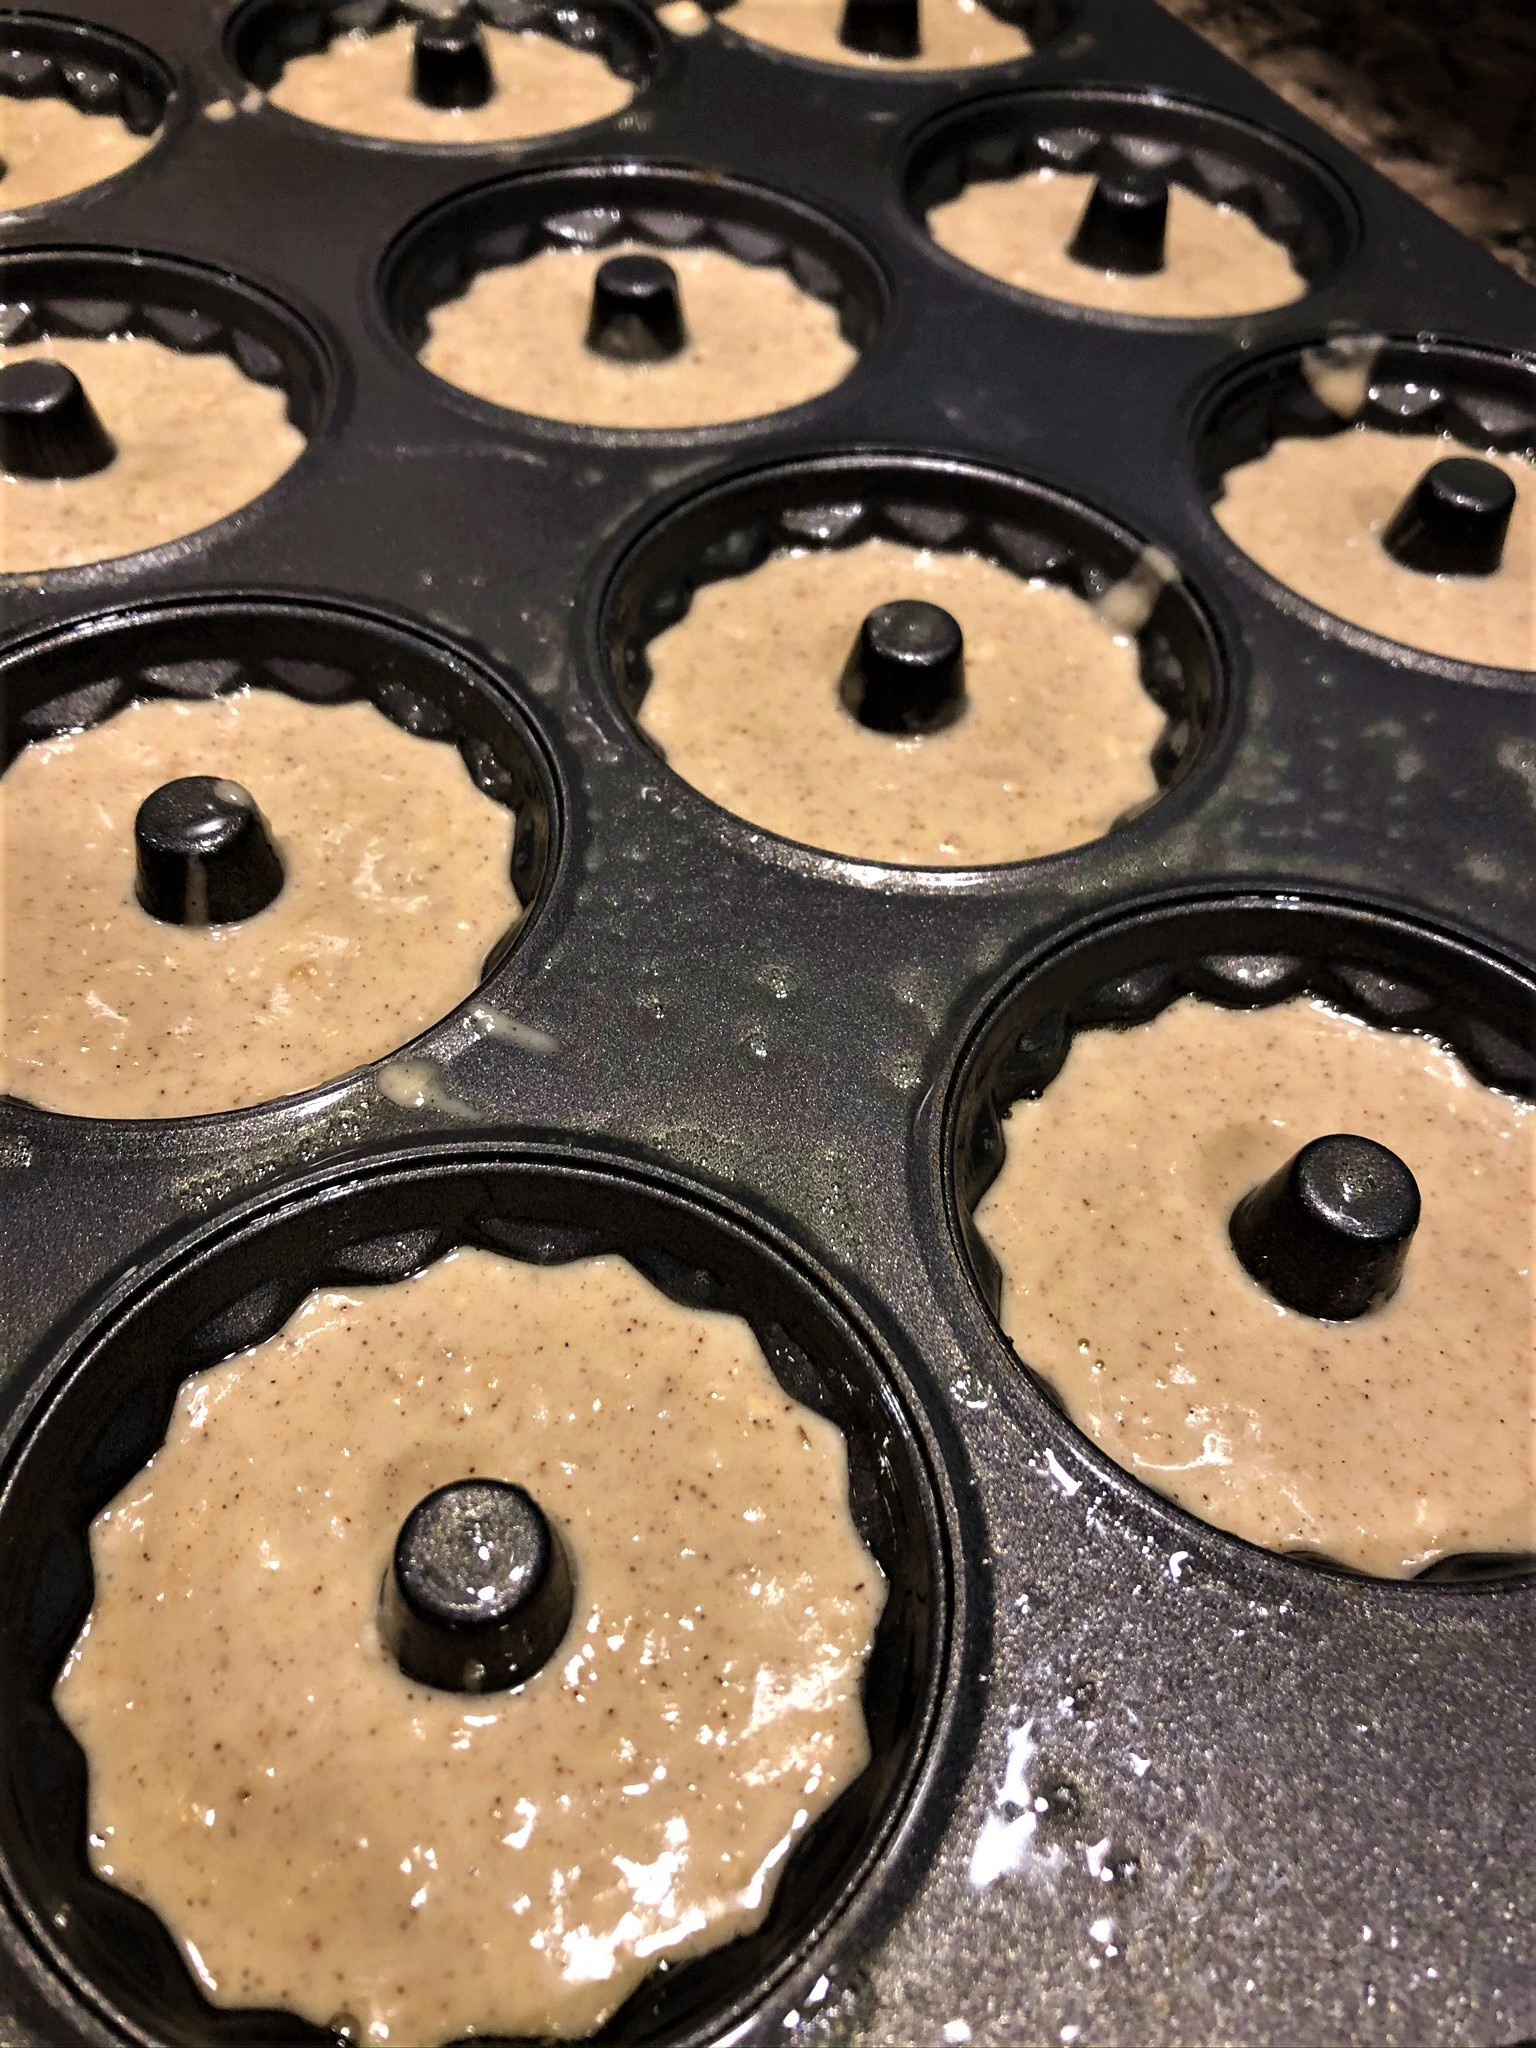
I double the box recipe for 12 mini bundt cakes.  I  also mix in half water and half milk.  I've found this makes the batter a bit creamier. Also adds a few more grams of protein.  Sprinkle in cinnamon for some hints of warm, subtle sweetness.  

Simply pour the batter into the pan, filling each cake cup about 3/4 full.  Bake for 15 minutes.  Store leftovers in airtight container for easy breakfasts all week long. 

Be sure to spray pan well around center and sides of cake cup

I don't track numbers but keep a general knowledge of my nutrition. Especially sugar to protein ratio. So for the way I mix this recipe, each mini bundt cake has approximately 78 cal, 6 grams of protein and 3 grams of sugar.  Obviously, that varies slightly with what mix you use, how you mix it and what you serve as toppings.   

But I call this a win. And this makes a great snack option too. 

Make a batch and you'll see why we eat nothing bundt pancakes around here!

Let me know if you try this recipe. Enjoy!

Xo,

Brit


Nothing Bundt Pancakes

Ingredients:

Preferred pancake mix, prepared

Cinnamon

Sausage links, fresh berries, or yogurt


Instructions:

1. Preheat oven to 350 degrees and spray mini bundt pan with non-stick spray

2. Sprinkle in cinnamon into your prepared pancake batter 

3. Evenly distribute the batter into the mini bundt pan, filling 3/4 way full, and bake for 15 minutes.

4. Run a butter knife around the outside edge of bundt pan and turn over to remove pancakes.

5. Serve warm with desired toppings and/or syrup. 

Notes

  • you could also mix toppings into batter. Small mixins like nuts, sprinkles, choc chips work best for this. 

Read More